Last weekend was Brigade Encampment at Fort Nisqually. Brigade is one of our biggest annual events, and this year, as it was also the first event we've enjoyed since COVID struck last spring, it was extra special. In planning for this event, I needed to satisfy a number of requirements for our kitchen fun throughout the weekend. We needed foods to sample to the public, offerings for the potluck on Saturday evening, projects to keep all three of us busily demonstrating both days without monopolizing the stove top or limited oven space ... and a dish to satisfy Challenge #4: First Fruits.  It's blackberry season in Washington, so choosing something "fruit-flavored, fruit-shaped, or using the "first fruits" of your local harvest" for this challenge was a no-brainer. However, I was stymied by the dearth of interesting blackberry receipts published in the Fort Nisqually time period. A search of blackberry receipts through 1855 yielded an uninspiring list of pies, jams, wines, and a syrup for treating cholera and summer ill -- not exactly the sorts of things I was hoping to wow our visitors with. Then, as I was losing hope, I discovered Mrs. Putnam's receipt for Cold Berry Pudding. It was perfect for the challenge, and through serendipitous good fortune, it also resolved a quest that I have been working on since I began volunteering at Fort Nisqually. Several years ago, I stumbled across a modern recipe for summer pudding. This incredibly simple dessert made from white bread, berries, and sugar yields a surprisingly tasty and refreshing treat with very little effort. I was convinced that it HAD to be something that was appropriate for our period. To my dismay, however, the closest I was able to come was a version called hydropathic pudding, which I couldn't document before 1875 -- twenty years too late for Fort Nisqually. The only reference in our time period that I could find was called Malvern pudding, and while the date (1855) was right, it didn't mention berries specifically, only apples, figs, prunes, and "other fruits". Mrs. Putnam's receipt is all about berries and parallels modern recipes for summer pudding almost exactly -- and it checked all the boxes: an interesting use for blackberries, a demonstration dish that I could entrust to my young protege Marissa, and a period-appropriate version of summer pudding that would do nicely for the potluck table, Thank you, Mrs. Putnam! The Source: Mrs. Putnam's Receipt Book; and Housekeeper's Assistant was published in Boston in 1853. The author is Mrs. Elizabeth H. Putnam. In the preface, she explains that the book is the result of her twenty years' experience as a housekeeper. The receipts contained therein were collected for her convenience and for passing along to her daughter. Mrs. Putnam states that she tested every receipt herself, and her goal was to "provide receipts which [would] enable one to furnish a table handsomely, at the smallest expense." The Receipt: A Cold Berry Pudding
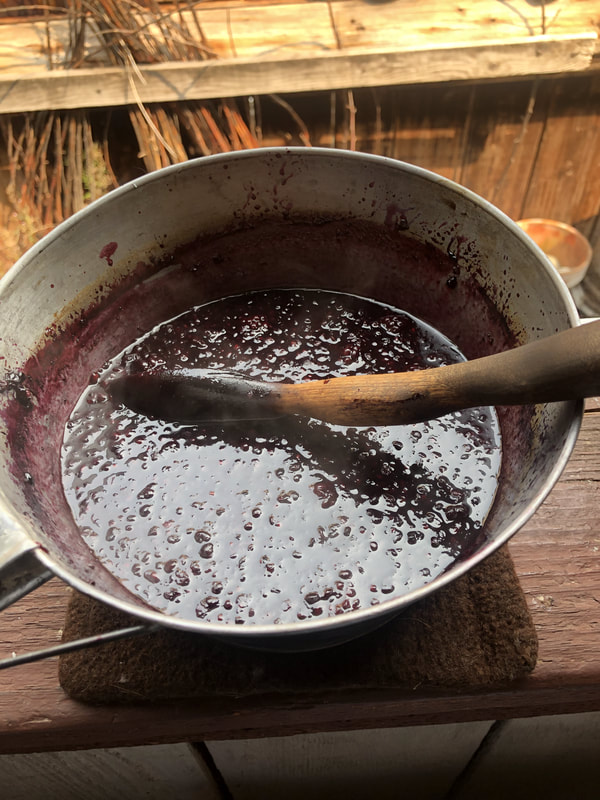
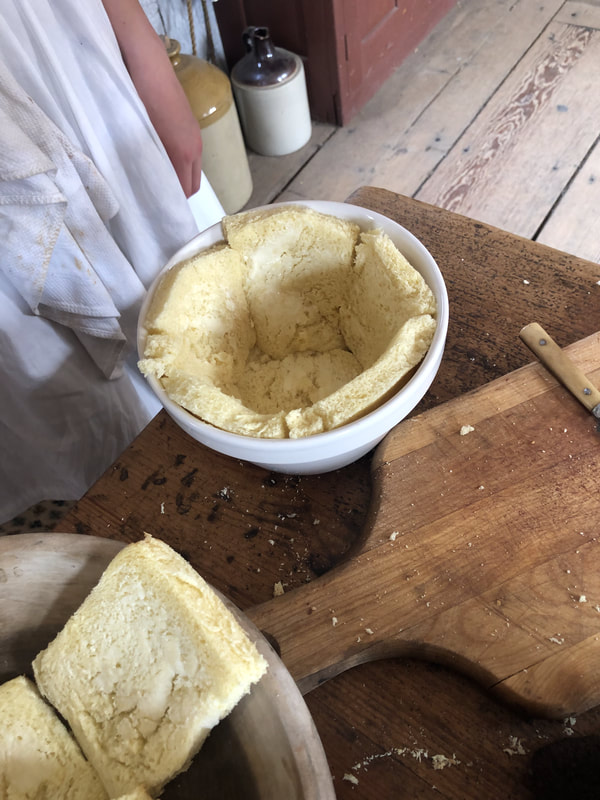
 Photo courtesy of Raymond Shirley Photo courtesy of Raymond Shirley How I Made It: I didn't. I turned this project over to my young protege, Marissa. Since, I couldn't fathom how a pudding with 14 cups of berries would be able to stand up, let alone where we'd find a mold big enough to hold it all or a plate large enough to serve it up on, I took a third of the receipt when I transcribed it. Probably because I did this task around midnight on the night before the event, my math skills were ... creative. I wrote 2/3 of a cup of brown sugar, which does not measure to 1/3 of a pound whether you measure the sugar packed or loose. But, since that's what my notes said, that's how much Marissa used. And there were no whortleberries. Or raspberries. Or currants, for that matter. We only had blackberries I had collected, and Marissa used about five cups of them. Mrs. Putnam did not specify how long to stew the berries and sugar together. In the modern recipe, it's only a few minutes -- just long enough for the berries to give up their juice. However, since the modern recipe calls for refrigeration and leaving the pudding to set for several hours, and sometimes even overnight, I thought it might need a bit of help. My reasoning was that without the refrigeration and time for the gluten to interact with the syrup, it would be too runny and the result would be a soggy mess. I instructed Marissa to stew it gently, stirring the while, until the sauce began to thicken. It thickened as expected, which proved to be rather too well, as it turns out. More on that later. While the stewed berries were cooling enough to be safe for Marissa to handle, she cut the crusts off a loaf of pre-sliced, store-bought brioche bread and buttered one side of each slice. Two things were learned here. First, store-bought brioche is VERY soft. Cutting the crusts off AFTER buttering would have been a better choice. Second, we should have gotten the butter much softer. Marissa had some trouble with the bread tearing and the butter not spreading well. Fortunately, given the half-jellied state of the stewed berries, the moisture barrier that the butter would have provided was not needed, and the tattered and unevenly buttered bread slices were not a problem.
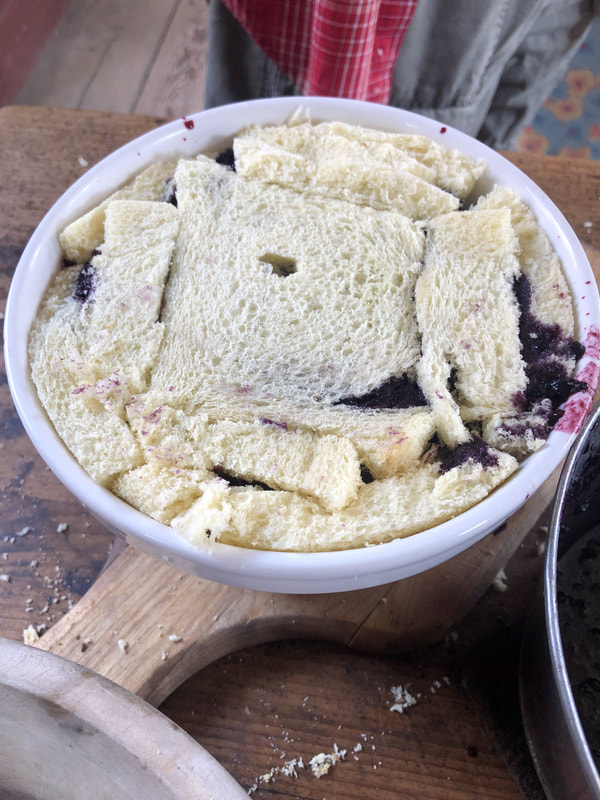
Once the bread was (sort of) buttered, Marissa lined the bottom and sides of a deep bowl with the bread slices, buttered sides facing inward. This was a guess on our part, since Mrs. Putnam didn't see fit to give specifics. Then, she alternated a layer of berries and a layer of bread until she ran out of room in the bowl. We debated about whether to end with bread or berries and opted for bread, thinking it would make a sturdier pudding and allow for a better presentation in the end. We had a generous amount of berries left over, which should have been a warning sign, but .... (NOTE the subtle use of foreshadowing here.)
Although Mrs. Putnam doesn't mention it, we used weight to help the pudding form up. A small stack of saucers fit nicely on top of the pudding, so we piled them up enough to compact the layers and help the juice to seep into the bread (theoretically), and then we left it for about four hours. Marissa didn't feel confident turning the pudding out, so she asked me to take over. It's a good thing she did. I inverted the pudding onto a plate ... and nothing happened. Puzzled, I plied a knife to the sides, thinking that they might need loosening, and that's when I discovered the problem: The bread was still perfectly white. Since we'd thickened the stewed berries so effectively, the juice hadn't seeped through and saturated the bread as it should have. Unfortunately, in my (lack of) wisdom, I had offered the bread crusts and extra berries to a gaggle of charming brigade fellows earlier in the day, and while they had pronounced the combination quite delicious, my generosity had left us in a bit of a tight spot. By this time, the potluck was drawing nigh, and we needed an emergency solution, so Marissa cooked up a some more berries and sugar, and we poured the mixture over the bottom. We also pulled the sides away from the bowl with a knife and poured some sauce down there, as well. We left it to cool for a bit, and turned it out again. This time, all but the top had been saturated with berry juice. To solve this final problem, Marissa spooned some of the juice from the bottom over the top, and then we were out of time for fiddling. Marissa gave the presentation a few finishing touches, whipped a little sugar into some cream to make a thickish pouring sauce, and out to the potluck it went. Cost and Time to Prepare: Since I bought an $8 brioche loaf rather than using a cheaper loaf, or better yet, something stale, that expense makes up the lion's share of the cost of this dish. The butter and sugar were on hand, so that cost was negligible. The blackberries were free because I foraged them. However, if the berries are also purchased, then this could have become a rather costly dessert. Time wise, it's a breeze. Stewing the berries only until the juice is released takes just a few minutes. The rest of the prep might take ten to fifteen minutes or so. The wait time is three to four hours, at a minimum, but since there's no effort during that time, I'm not sure it counts. Accuracy: Well .... I'd say that our version of this dish only qualifies for the loosest definition of accuracy. We used only blackberries and left out the whortleberries, raspberries, and currants. We made the whole receipt smaller than the original and mismeasured the sugar. We cooked the blackberries and sugar too long and had to whip up some more at the end. And we used modern, sliced bread. The end result was shaped more or less as intended, though. At least we got that right! How Successful Was It? Despite all the creative license we took, this dish was a resounding success. Marissa was proud of it, and it got rave reviews at the potluck. To improve it, I would stew the berries and sugar minimally, and possibly skip the butter on the bread. Also, it's quite sweet enough, so plain cream -- or very lightly sweetened whipped cream -- is sweet enough. I will definitely make this pudding again. 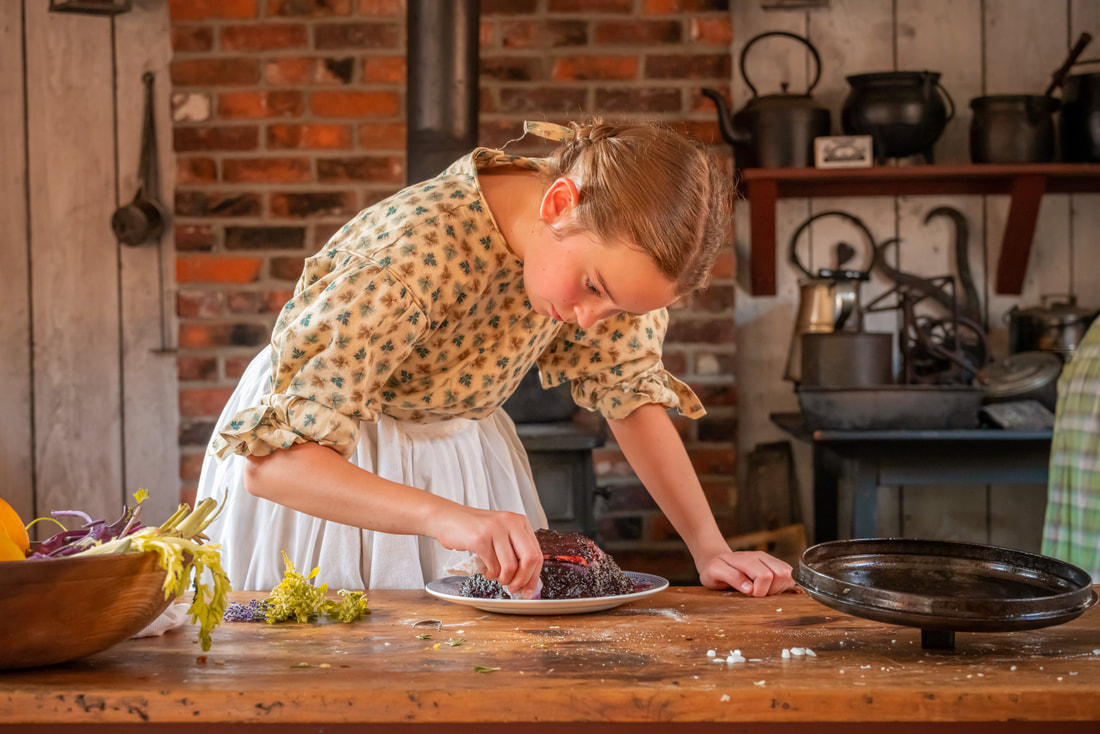 Photo courtesy of Raymond Shirley
0 Comments
 The Challenge: The challenge this fortnight was "Keep it Simple -- Make a dish that uses few ingredients or simple techniques." Boy was I thankful for that! Between appointments for my wrecked knee, starting physical therapy, getting things ready for a road trip that will launch my foray into breeding Old Time Scotch Collies, committing to a serious return to horseback riding, and teaching a Victorian cooking webinar at the Fort, my fortnight was full. Unfortunately, when I was at the Fort last weekend, my wimpy knee didn't have the stamina to do the webinar dish and a HFF challenge, so I found myself once again, preparing my challenge dish in my modern kitchen. On the other hand, since I was cooking from home, I had access to my garden, which served as the basis for my choice of receipts. My poor garden -- which has also suffered from my wrecked knee and busy schedule -- is currently overrun with purslane. I knew the weed was edible, but I didn't really know what to do with it. So, I did a search for purslane receipts, bypassed the ones for pickled purslane, and settled on the most simple of simple dishes: a salad that features purslane as the first ingredient. The Source & Receipts: Since I really should be finishing the laundry, typing house-sitter instructions, and packing instead of blogging, this fortnight, I am all about shortcuts. (Priorities, right?) So, in keeping with the theme of simplicity, below please find screenshots of the source and the receipts,
Another area where I deviated from the original receipt is in the omission of walnut-ketchup. In looking at the period receipts for walnut-ketchup, I wonder if the additional Worcestershire sauce I added might been closer than I realized. There is also the matter of the greens substitutions I used: nasturtium leaves for cress, and nasturtium flowers for mustard greens. Since they were all in season in this area, and a cook of that era could easily have acquired them, I am comfortable with the level of accuracy there. Overall, I'd say this effort was close enough to get a solid idea of what the dish would have been like in its time. How Successful Was It? It was definitely a very beautiful salad, and the flavor was acceptable. I wouldn't make the receipt again without a few changes, however. While I am a big fan of Caesar salad (which includes anchovies in the dressing), I found the essence of anchovy flavor unpleasant. Perhaps using less would make it more palatable for me, but overall, I don't feel that it added anything useful to the flavor of the dressing. I think the whole dish would benefit from omitting the essence of anchovy, and the wallet would benefit from the expense spared. Another change I'd make for next time would be in the selection of nasturtium leaves, I chose the larger ones so that I could use fewer. Unfortunately, the large leaves had a slightly fuzzy texture on the underside that detracted from the rest of the dish. Next time, I will opt for smaller, younger leaves. Finally, I was somewhat disappointed that the purslane didn't seem to add anything to the dish. I think the dressing was so piquant and the other ingredients so numerous that they overpowered the mild flavor of the purslane. I need to work on balancing my flavors between the dressing and the salad base for next time. Nevertheless, it made a nice supper for a warm summer evening, and with a few minor changes, this dish would be a suitable and attractive addition to a meal at the Fort.
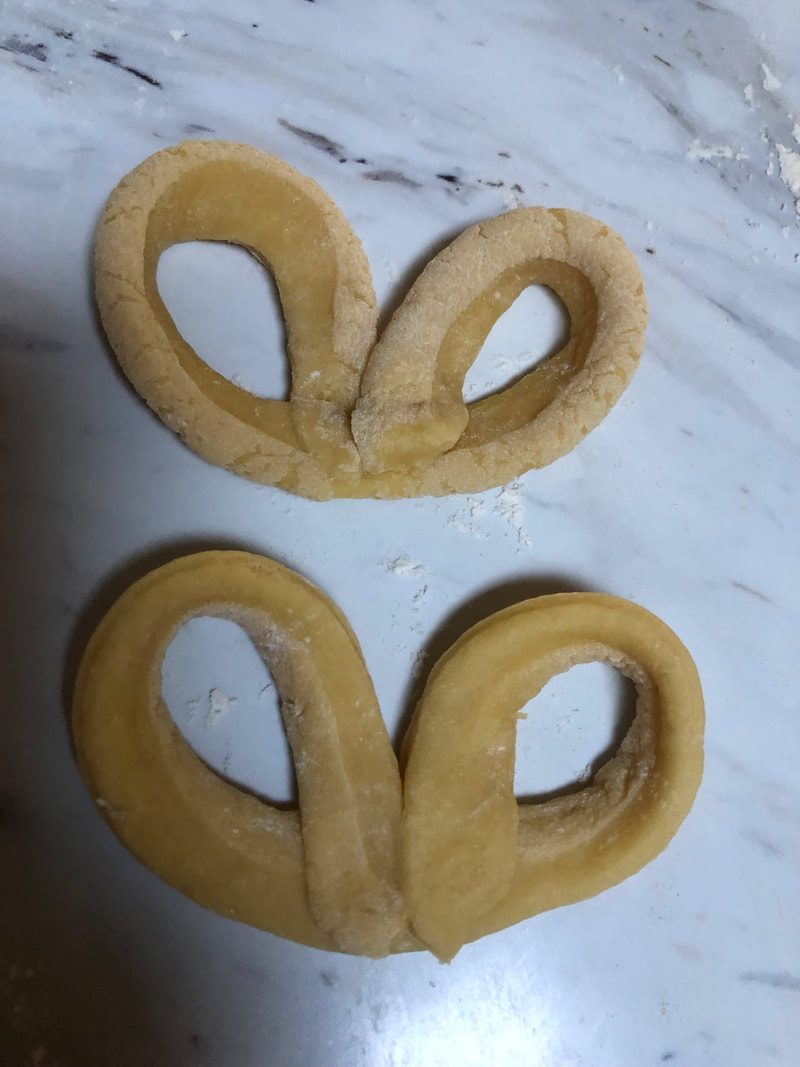
 The Challenge: This challenge is about making a breakfast dish. While I really wanted to step outside my comfort zone and try making a fishy breakfast food, the preparations for these weren't anything inspiring, and the idea of trying to find an appropriate fish in my rural corner of the world was daunting enough to send me looking for other ideas. Sifting through lists of ho-hum breakfast dishes like mutton hash (you can't get mutton around here, anyway), minced veal (too expensive and BORING), dozens of variations on pancakes, potatoes (boiled, fried, and even mashed!), and your basic eggs and toast, I came across a few intriguing receipts, and I was torn between a short list of favorites, Then, with the end of the fortnight looming, I re-sprained an injured knee and decided that I needed to keep things simple. So, while grumbling to my hobbling self about the lackluster appeal of doing a historical cooking challenge in my thoroughly modern home kitchen, I set to work on the oddest recipe in my list: breakfast tourtulongs, , (Never fear, though, dear reader. Despite the simple recipe and convenience of my own kitchen, I still found ways to make the process ... interesting. Fortunately, there was only one casualty, and no kitchens were harmed in the making of this receipt.) Tourtulongs are so named for their tortuous, crooked, or circular form. (Apparently, there is some link to a French term along those lines.) One source that gave a definition but no receipt described the tourtulongs as small biscuits or cracknels, and another likens them to biscotins [sic]. Tourtulongs can be found in a small handful of different cooking books between 1808 and 1818. All of them offer the exact same receipt, and there are no other variations. It does not appear that tourtulongs were terribly common in period, nor could I find a modern recipe of the same name for comparison. Based on the method and ingredients, tourtulongs seem to be something of a cross between a sweetened pretzel and an egg noodle. For breakfast. Much more intriguing than clam fritters, mutton hash, buckwheat cakes, and mashed potatoes! The Source: While the same receipt appears in more than one source, I'll credit the one that I found first. Brace yourself; the title is a bit unwieldy. The Universal Receipt Book: Being a Compendious Repository of Practical Information in Cookery, Preserving, Pickling, Distilling, and All the Branches of Domestic Economy. To which is Added, Some Advice to Farmers was written by Priscilla Homespun in 1818. It was published in Philadelphia. I suspect that the author's name is a pseudonym, but there is no prologue or other information in the book to give any clues to support my theory. The Receipt: Breakfast Tourtulongs  "... Mix well together a pound of flour with four beaten eggs and a very small quantity of salt, and about two ounces of powdered loaf sugar. Placing some boiling water over the fire, roll out the paste and make it into pieces of the thickness of the little finger and from four to six inches long, join the two ends of them in two circular or oval rings, and throw them, a few at a time, into the boiling water. As they rise to the surface, take them out and put them into a pan of cold water, and there let them remain till next morning; when, draining them on the top of an inverted sieve, place them on a tin plate without any paper beneath, set them in a hot oven, and on their rising very much, the more the better, provided they are not burnt, but are of a brown color, they will be ready for eating."
 I didn't let them soak overnight, but I left them for about six hours. They held their shape in the water bath and came out pretty much as they went in ... but with an added layer of slime that made them really slippery. I opted to grease the cookie sheet since there was no fat in the dough. I was concerned that the water would evaporate off the biscuits, and it would act like library paste and make them stick. I baked them at 425 for just over a half hour. They did not seem to rise much, but I was afraid of baking them into rocks, so I pulled them out when they began to look brown. They came off the sheet easily. As I moved them to the cooling rack, I was not optimistic about the outcome. They clinked on the metal and felt hard to the touch. Cracknels are hard, brittle biscuits, and these were supposed to be similar, but they felt ominously solid. Bracing myself for failure, I left them to cool a bit before sampling. Time to Complete: Preparing the dough was fairly quick, even though I had to much about with the extra egg. I boiled them as they were ready, and shaped the rest as the first ones boiled. I was able to do a bunch of them at once, and they only boiled a minute or two, so it was a quick task. I think this first part of the receipt took about an hour, including igniting a kitchen towel and cleaning up. I had to bake them in two batches, which together, took over an hour. If I'd been in the Fort Nisqually period kitchen, the hottest baking area in the wood stove would have necessitated three or four smaller batches, and baking would have been more time-consuming. Overall, in my modern kitchen, it took about two and a quarter hours to produce a full batch of tourtulongs. Since the soaking time didn't require any attention, I left those hours out of the total. I am inclined to believe that leaving them in the water overnight was partially to save time in the morning. With the dough already formed, all the cook would need to do is warm up the oven and pop them in while other breakfast dishes were being prepared. Keeping them in water overnight would prevent them from drying out. The cool water may also stop them from overcooking and becoming tough before they go into the oven to dry out. I remain curious about how much of the water is absorbed during the soaking, and how much a shorter or longer soaking time (or none at all) would change the texture. It could be an interesting experiment. Total Cost: Tourtulongs cost very little to make. The cost of a pound of flour and two ounces of sugar is negligible, and right now, I have SO MANY EGGS on hand that using them makes valuable space in the fridge! This receipt can be prepared with pantry staples and doesn't require any extra shopping. Accuracy: I have many qualms about the accuracy of my version of this receipt. First is the obvious deviation from the receipt: soaking for six hours versus soaking overnight. I think, since a cook in a big house might be up late and rise early, the six hours was probably close enough not to make a difference. A bigger deviation was more likely to be my poor choice of sugar. Modern powdered sugar isn't the same as sugar from a loaf that is pounded to a powder. I should have used granulated sugar, which is closer and probably would have alleviated the moisture issue that I had with the dough. Third, I'm pretty sure I got the shape wrong. The more I ponder, the more firmly I believe that the shape should have been two concentric or overlapping circles, and I'm still not sure I got the thickness of the dough right. On the other hand, since I can't find an equivalent receipt ANYWHERE, modern or historic, I haven't the vaguest idea of how the receipt was actually supposed to turn out. Maybe I'm closer than I realize ... or maybe I have produced something entirely wacky and am nowhere near the intended outcome. Who knows?
Would I make this receipt again? Yes. I think I would like to try again, using granulated sugar, changing the shape, and shortening the soaking time, just to see what happens. Perhaps I will revisit this receipt next June, when the challenge is to reflect on a receipt you've made before. Now, if you'll excuse me, I think I need to go make a cup of coffee. There is some tourtulong-dunking research that's calling my name.
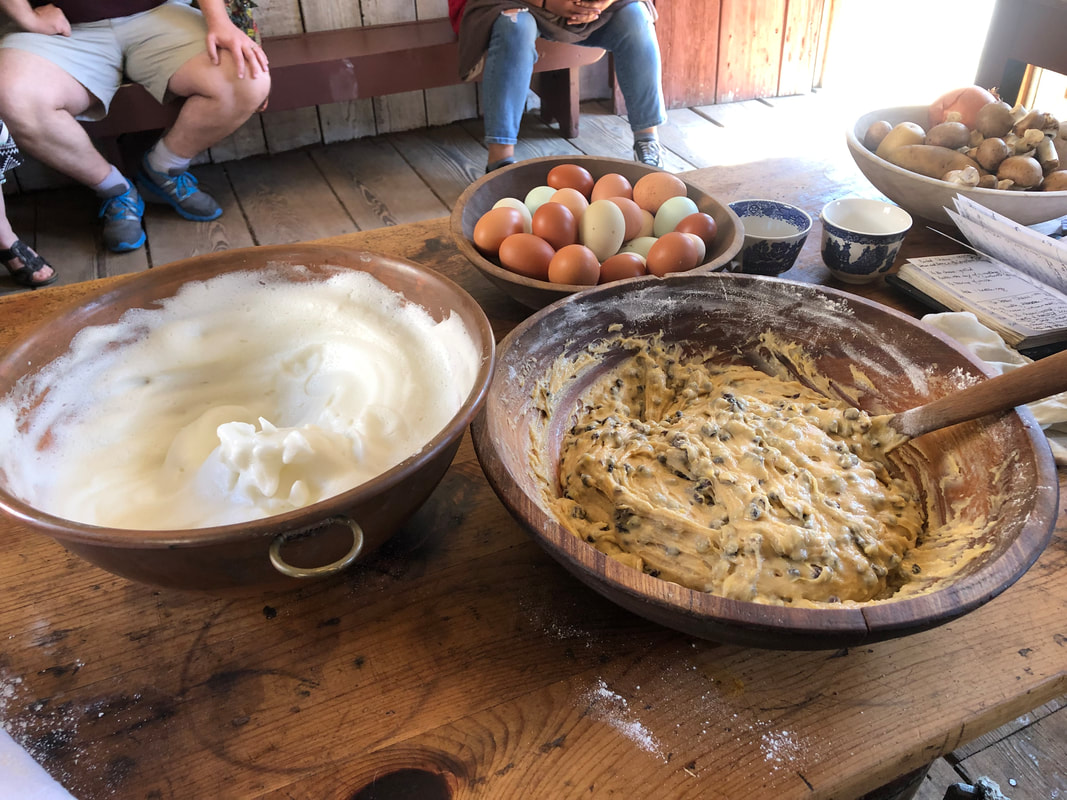
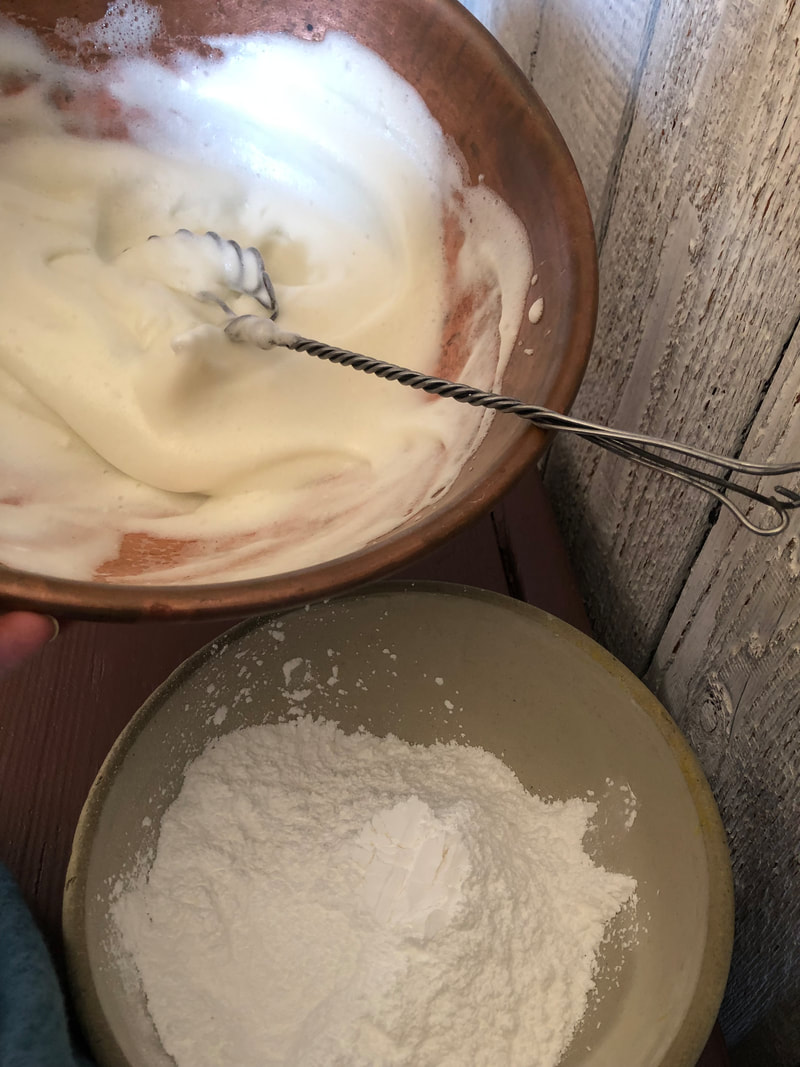
Wow. It's been nearly two years since my last entry. Blame grad school. Then blame COVID. Anyway, I'm back!  The Challenge: Round 5 of the Historical Food Fortnightly Challenge began July 1st. The first challenge is "Start Strong" in which participants are to leap into Round 5 with "something 'strong'--strongly flavored, associated with strength, or even full of strong spirits." Since I was lacking inspiration for anything more clever, I simply used a search of the word "strong" in recipes from the 1850s. In surprisingly short order, I was rewarded with the perfect receipt; Granny Strong's Loaf Cake. Not only is the word "strong in the title, but it contains not one, but TWO different types of alcohol, which (I thought) should render a fairly strong flavor. Additionally, since the only leavener in the receipt is the egg, the whites would need to be beaten to stiff peaks, which really does require a great deal of arm strength. And finally, since the quantity of ingredients given in the receipt is ENORMOUS, the cook would need to be pretty strong to manage a bowl full of the batter. This receipt was so very "strong" that I just couldn't pass it up.  The Source: The American Matron; or, Practical and Scientific Cookery was published in Boston in 1851 by the author, A Housekeeper. This author was clearly writing under a pseudonym, and the preface of the book doesn't offer any information to establish their credibility. No matter, though. The tagline that appears on the title plate really says all one needs to know about the author's level of expertise: "Haud inexperta loquor" "Not as a non-expert speak I" ... or something like that. My Latin is pretty rudimentary. Nevertheless, upon reading those lofty words, I was wholly reassured. I mean, who needs credentials when they can use Latin! In all seriousness, A Housekeeper offered a fairly comprehensive overview of the methods for cake-making at the beginning of the cake chapter. This is a fairly common practice in period receipt books. Unfortunately, I am chagrined to admit that I did not discover this helpful feature at the time. In fact, I didn't find it until I was reviewing The American Matron while writing this article. Thanks to my overhasty job of receipt selection, I missed the methods discussion and did it the hard way: I used what I knew from other period receipts, cross-referenced another similar receipt (French Loaf Cake) in another source (Miss Beecher's Domestic Receipt-book) from about the same time (1846), and I winged it. As things turned out, it probably wouldn't have mattered. I managed to ignore just about everything I wrote down anyway.
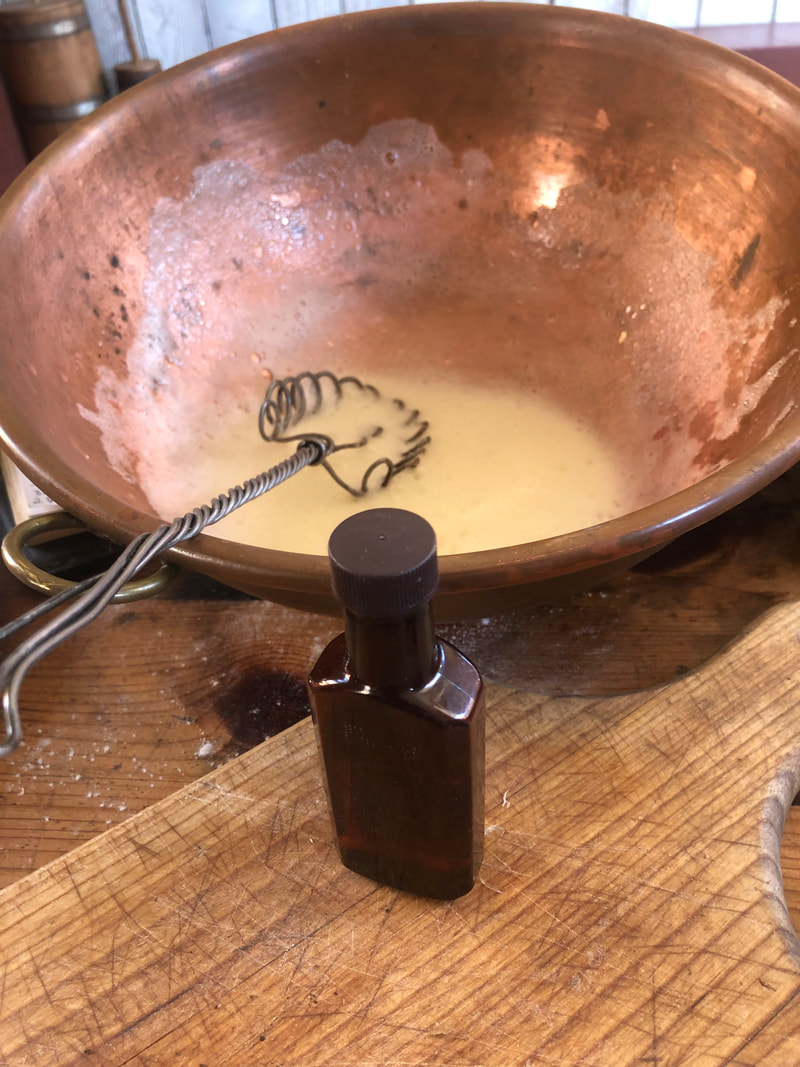
As I whisked and measured ingredients, a steady steam of visitors gathered in the kitchen, looking on, asking questions, and soaking up my spiel. At one point, the viewing area, both windows, and the doorway were full of eager, engaged guests. It was a wonderfully busy morning, and every guest was a delight to interact with -- the kind of audience that interpreters live for. My multi-tasking skills, on the other hand, took one look at that audience and bolted away to hide under a rock without leaving a note. Sadly, I didn't realize that my brain had been left short-handed, and I continued blithely on, happily making a complete hash of Mrs. Strong's Loaf Cake receipt. Once the egg whites and yolks were well-beaten, I did some quick (perhaps too quick) mental math. I converted pounds to ounces, took one-third of two pounds, and carefully weighed out one and a third pounds of sugar. Now, in case you didn't catch that, one-third of two is NOT one and a third. But if you didn't catch it, don't feel badly. I didn't catch it either. But the fun didn't end there.
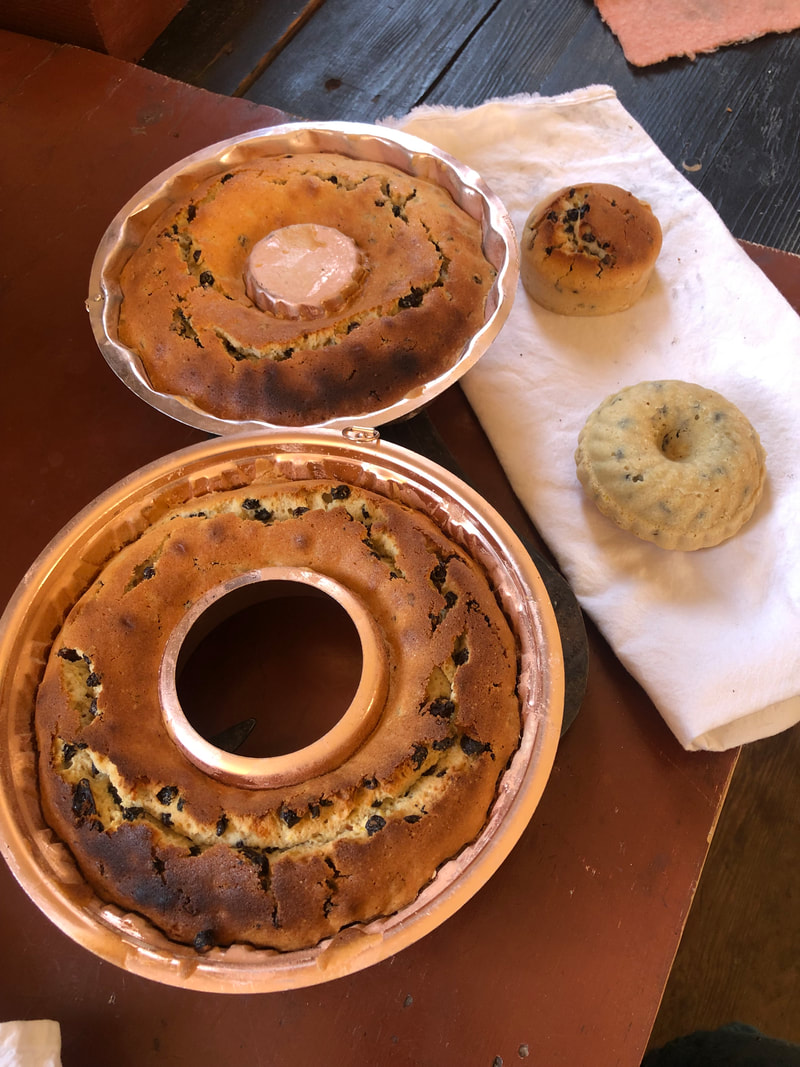
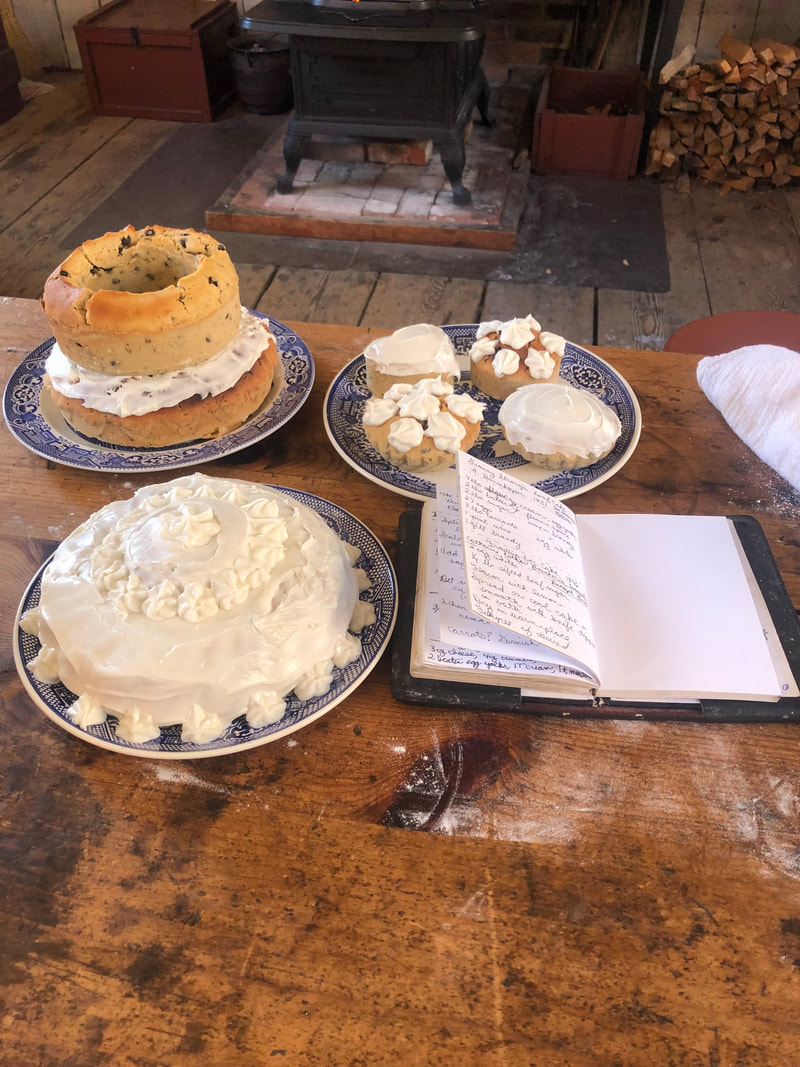
With the crisis averted, I added the brandy and some pinot grigio to the batter. I used white wine because I already had it on hand, and I thought red wine would discolor the cake. Finally, I added the currants and then folded in the egg whites. While I was eager to use my period loaf pan, I knew the chances of success with it were slim. Keeping the temperature steady long enough to bake it through would be a real challenge, especially with the steady stream of visitors we were enjoying that day. I knew I'd get distracted, so I opted for pudding molds with cores in the center to help expedite and simplify the baking process. At this point, a family with a pair of charming little girls joined the audience in the kitchen. The girls helped with some of the washing up, and then buttered and floured the tins for me. The pudding molds worked a treat, and there was enough batter left over to make some small cakes and to try out our tinsmith's queen cake prototypes, too.
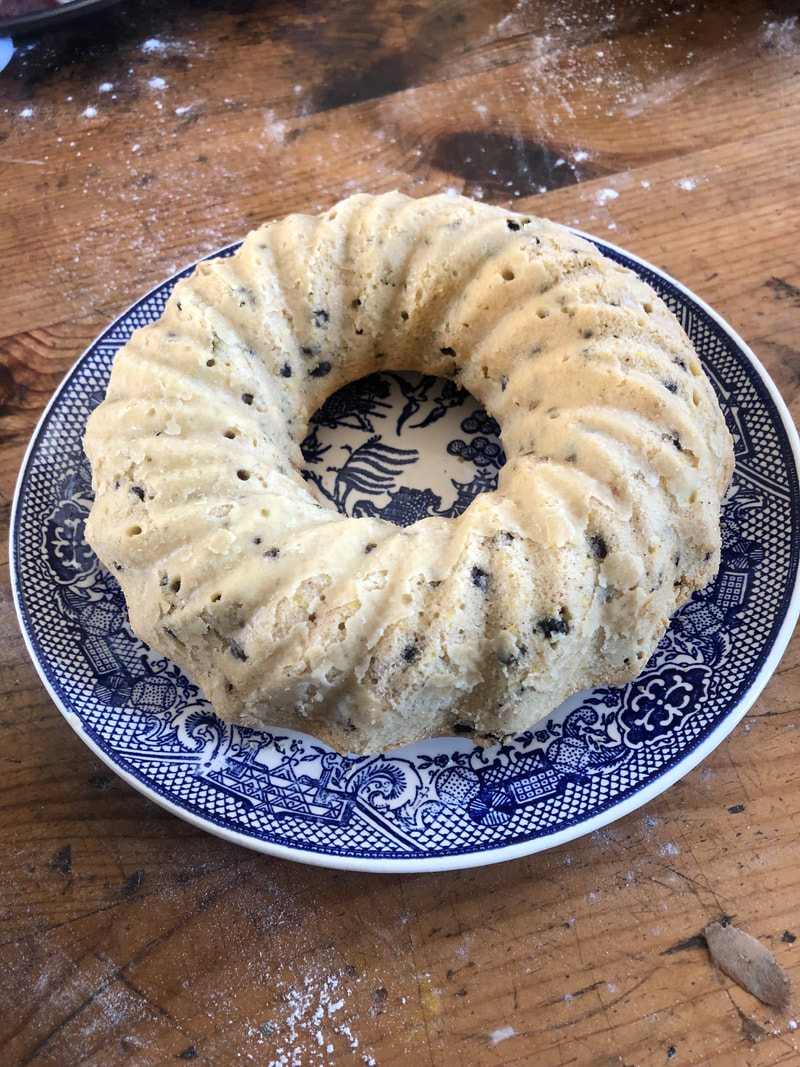
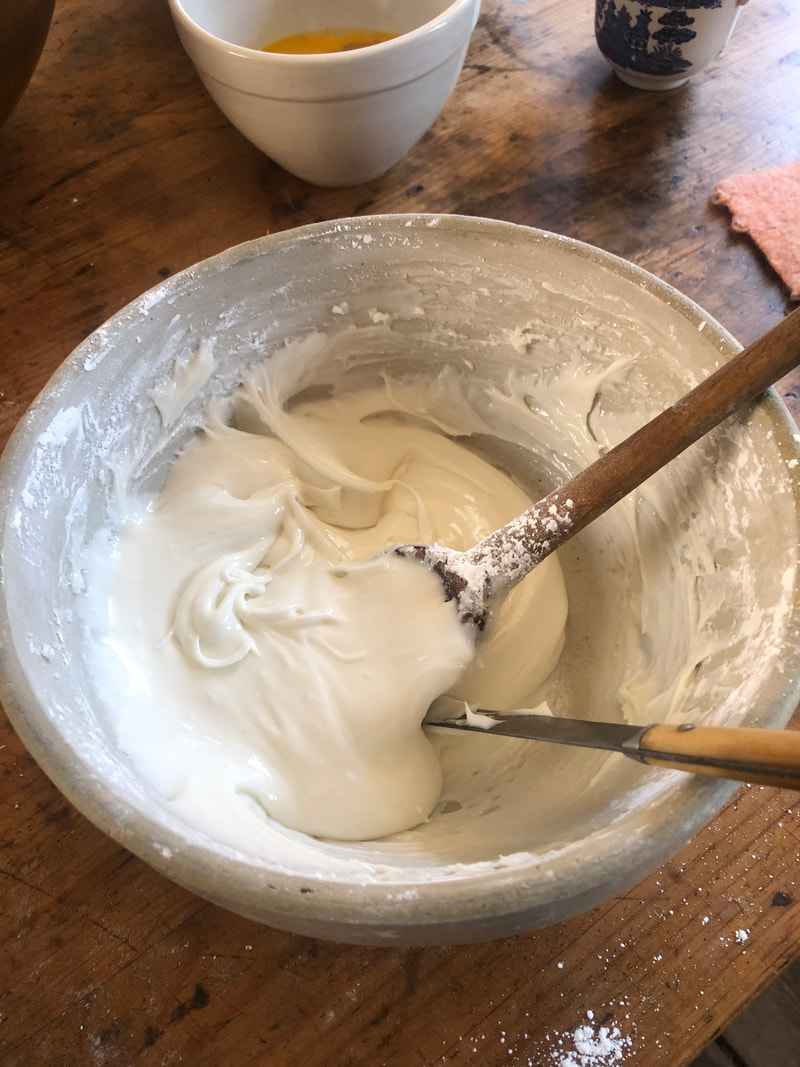
The baking was uneventful, although, I was so busy chatting with our visitors, that I haven't the faintest idea how long they baked for. I tested them with a knife in the center for doneness, left them to cool, turned them out, and frosted them. The frosting was fairly straightforward, although I only used four egg whites. I can't even imagine the amount of frosting 18 eggs would have produced. I beat the egg whites to stiff peaks and then just added powdered sugar until it seemed the right consistency. In the end, while it spread nicely, it ended up being just a shade too soft to pipe well. I might have needed more sugar in the batch I piped with, but I don't think I would want it that dry to try and spread. I took a creative liberty with the shape of the cake. The middle hole was way too hard to frost nicely, so I plopped one of the smaller cakes into the hole and frosted right over the top of it. It was unconventional but effective.
Time to Complete: Between beating the egg whites, a steady stream of visitors to chat with, the enormous quantity of batter, and the small space in the oven that lends itself to consistent baking temperatures, The whole process from start to end took most of the day. However, in a modern kitchen, the most time consuming part would be the baking time. A loaf pan of this dense batter would likely take an hour and a half to bake through. Just to be safe, though, I wouldn't recommend taking on this receipt unless you have a whole day to commit to it. Total Cost: This is not a frugal cake to make. It takes a lot of currants at about $6 per 8-ounce bag. I used two bags for 1/3 of the receipt. I didn't have brandy on hand and had to purchase a new bottle at around $11. I used cheap white wine; he bottle cost about $7. If you already have the spirits on hand, the receipt doesn't use much, so that expense may not apply to you. I used eggs from my home flock, but it you had to purchase them, you'd need a whole dozen. Depending on if you are using commercial eggs or buying farm fresh heritage breed eggs, the prices will vary. The butter, flour, sugar, and spices were staples on hand. Accuracy: Heh. Well ... since I completely botched the first few steps, mismeasured the sugar, and used a mid-20th century Jell-O mould instead of a loaf pan, accuracy went out the window. I also used modern versions of flour, sugar. Since real currants are not easily acquired, I used Zante currants, which are really just small raisins. I also didn't pound and sift my own powdered sugar for the icing. On the other hand, it was prepared in a period kitchen, using period techniques, and the eggs were from free-range, heritage breed hens -- likely comparable to those used in 1851. Overall, I'd say my version was close enough to get the idea of this type of cake from the period, but not a textbook example of Granny Strong's Loaf Cake. A Housekeeper would likely not have approved.
 The Challenge: Heading into May, the challenge was "Literary -- A dish mentioned in a work of literature." Ugh. True confession time. I don't think I have voluntarily read a single piece of Victorian literature in my life. I've read a little Robert Burns (mostly for song lyrics) and a collected works of Rudyard Kipling, but aside from those, all of my 19th Century reading happened under duress. They were school assignments, and I barely remember the plots, let alone any references to food. That being said, I'm sure it's easy to imagine my discomfiture when it came time to choose a recipe for this challenge. At this time of year, the LAST thing a middle school teacher has time to do is pick up a Victorian novel and have a good read! Or a bad one.
The Jack Aubrey books are set in the era of the Napoleonic Wars, but spotted dick has been around in some form or other since the 1500s. As a result of this steamed pudding's fun name, by 1854, the straight-laced Victorians had redubbed it "spotted dog," "plum bolster," or "railway cake". It now goes by several other names too, depending on the nature and delicacy of the cook who is offering it up. As much fun as the name is, the 'dick' part probably isn't quite as colorful as it sounds: it's more likely a variation or dialectical play on the word 'dough' The Source: A Shilling Cookery for the People by Alexis Soyer was published in London in 1855 and embraces "an entirely new system of plain cookery and domestic economy" according to the byline. The book was very popular in England, but amusingly, Soyer was French and never learned to write in English. The whole book was dictated to and translated into English by somebody else. As a result, all of Soyer's work is written in rather informal language than contemporary cookbooks, which probably contributed to its popularity with middle class cooks of modest means. This excerpt from the text describes it rather nicely.
The Receipt: Spotted Dick "Put three-quarters of a pound of flour into a basin, half a pound of beef suet, half ditto of currants, two ounces of sugar, a little cinnamon, mix with two eggs and two gills of milk; boil in either mould or cloth for one hour and a half; serve with melted butter, and a little sugar over."
Remember how Mr. Soyer said that he included detailed instructions in his receipts? Heh. Yeah. So ... how did he say to incorporate the fat with the ingredients? Oh, that's right. He didn't. Every baker knows that you don't put everything together at once, or it will never combine properly. Now, I didn't read the entire book, and perhaps Mr. Soyer did explain this earlier in the text, but the receipt itself certainly doesn't give enough explanation. So I guessed. Since the instructions do not indicate melting the suet, I could think of two other approaches: cream the fat and sugar together, then add the eggs and milk, and finally the dry ingredients, OR cut the fat into the flour, then add the rest of the dry ingredients, then the eggs and milk. I went with cutting the fat into the flour, since I wasn't sure if beef suet would have acted the same with sugar as butter or shortening. After the flour and shortening were creamed together, I added the rest of the dry ingredients and whisked them all together. I used about a tablespoon of cinnamon, since the receipt left the amount to my discretion. (I found "a little cinnamon" a bit vague.) I beat the eggs in a separate bowl and combined them with the milk before stirring the mixture into the dry ingredients. It made a rather stiff batter -- of which I failed to get pictures. You've heard it before: visitors, distracted, blah, blah. (You should know that we were careful to only call it "spotted dick" to groups that were all adults. Those with children learned about "spotted dog",)
How Accurate Was It? The use of shortening in place of suet was the biggest inaccuracy. On the other hand, two people from Britain who sampled it said it was just as they remembered their mums making, so in that respect, I'd say I nailed it.
Spotted dick is fun to say, economical and tasty, easy to make, and you can even look up online how to get around not having a steamed pudding mould. The best part is that the next day, the leftover slices make some of the best French toast you will ever eat. I highly recommend this receipt as a simple, cheap dessert or tea-time treat. Plus there's just so much entertainment value to be had by giving spotted dick to everyone you love.  The Challenge: The theme for the end of April was "Savory -- A savory dish with or without 'savory' herbs. I found this one surprisingly frustrating to find a receipt for ... mainly because I knew from experience that the Victorian ideas for seasoning savory items rarely pleases my palate. I usually season savory items rather strongly -- often with a lot of garlic -- and the period cookery books I've seen rarely, if ever, season anything with garlic. This article proposes several reasons for the shunning of garlic, including fear of garlic breath, the mess that would make of Victorian sensibilities, and the requirements of period etiquette. The author states, "Victorian manners dictated that no lady or gentleman was ever to be caught in polite company with garlic on the tongue." He also proposes that the British (and subsequently the Americans with aspirations who emulated them) associated garlic with less civilized cultures, and also with the lower classes. According to the article, "garlic was a cheap, widely available way to deliciously season the otherwise bland foods available to the poor in an era when most other spices and seasonings were far more expensive than they are today. For the same reasons garlic was popular among the British workers and European peasantry, it was widely consumed by slaves in early America." So, class consciousness may also have contributed to the absence of garlic in Victorian cookbooks. Whatever the reason for the absence of garlic, the lack of it has put me in the habit of bypassing period recipes for most meats (which pretty much NEED garlic to make me happy), and I don't really need a recipe for cooking a vegetable, especially given that Victorian vegetables are usually dully flavored, mostly unseasoned, and boiled nearly to mush. But, since I needed a main course to cook for a Fort visit anyway, I bit the bullet and forced myself to find one. I reached for my best hope of finding something flavorful and challenging enough to keep me interested: The French Cook. The Source: I used The French Cook (aka "The crazy French Choose-Your-Own-Adventure cookbook") for Challenge #5, so I shouldn't have been surprised when the process of recipe selection turned into a wild goose chase. By the time I got through all of the "as aboves" and French techniques that, in turn, had their own entries, I needed six different receipts to cook this one dish. I'll spare you the details and just share the receipt for the main sauce here. (In the event you want to retrace my tracks for your own edification, I referred to entries #27, #24, and #23 from 'Entrees of Fowl', and #81, #83, and #14 from 'Sauces, Broths, and consommés in addition to the one I'm sharing.)
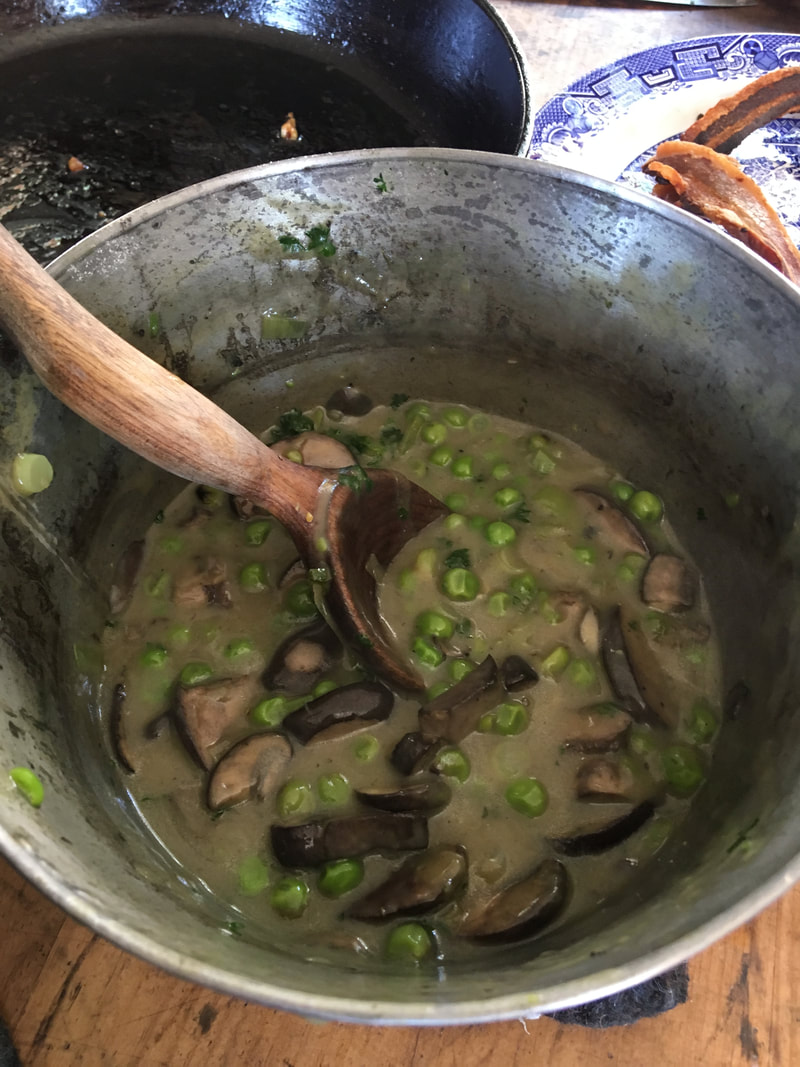
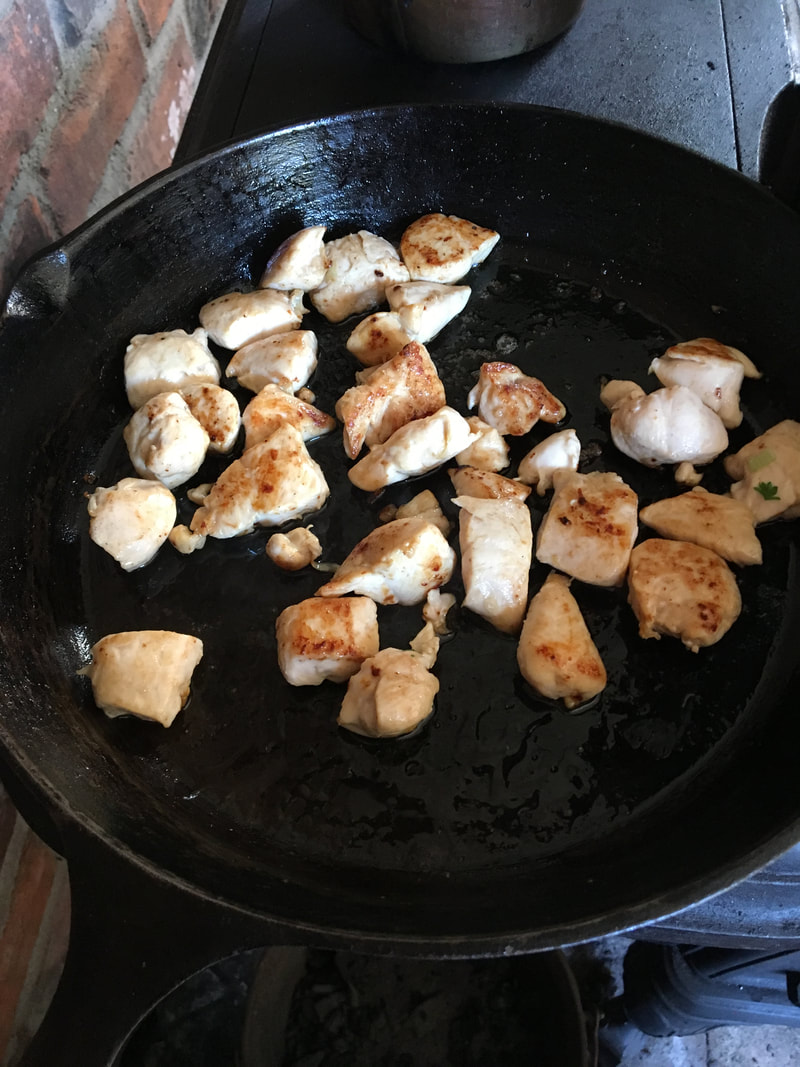
While the sauce was simmering, I was sweating the (not period-appropriate and completely out of season) frozen peas in a small saucepan with some butter and some more mushrooms, parsley and leeks. This was utterly unnecessary, but since I cleverly read the wrong page and confused the receipt for Blanquette with the receipt for Green Peas and White Sauce, that's what happened. When the peas weren't frozen anymore, and the second round of parsley, mushrooms, and leeks (which I wasn't supposed to put in) were softened a bit, I combined the tournee with the yolks of four eggs, tempering it so it wouldn't curdle, returned it to the heat, and then tossed in the peas and veggies mixture. I brought it up to a boil to thicken one last time. As the various stages of sauce were doing their thing, I cut the chicken into "scollops of the size of a half-crown piece" ... or something like that, since I have no idea how big that actually is, and I did "sautez them over a brisk fire on both sides" until they were white, as Ude instructs in receipt #24. When the sauce was done, I combined it with the sauteed chicken and gave it a taste. It was bland as heck. I added a bit of salt and pepper, which helped some but not enough, and then I spooned it into bread bowls for serving. (This was my own idea, not Ude's. It was just too boring to eat it alone. Bleh.) Time to Complete: Altogether, it took maybe an hour and a half, including chopping veggies, waiting for things to boil and thicken, and browning the chicken. In a modern kitchen with modern amenities, the time would perhaps be a bit less.
How Successful Was It? It was edible. Others who tasted it were quite complimentary, but I thought it could use some improving. The general impression was much like a somewhat bland mushroom soup-based crockpot casserole-type dish, but without the saltiness and fake flavor of the canned soup. Adding some poultry seasoning -- sage, rosemary, thyme, and marjoram -- would improve it a lot. And more salt. And more pepper. But what it really needed was ... you guessed it: garlic! All kidding aside though, with enough seasoning, I think it could actually be quite good. The bread bowls made it very attractive and were great for soaking up the gravy, but it would work as well served over rice, noodles, mashed potatoes, or used to top a baked potato or as a filling in a pot pie. I'd make it again ... but only if I had full access to my home spice cabinet, and the help of my trusty savory partner, garlic. I'm sure poor Monsieur Ude is turning over in his perfectly virtuous, upper class Victorian, garlic-free grave. Oh well. More garlic for me!
  The Challenge: In early April, spring has sprung in the Pacific Northwest, but the garden pickings are still mighty sparse. I can only imagine how early settlers in this area must have felt in that uncomfortable time after making it through the winter on the food they'd put up, but before the earliest greens were ready to pick in the garden beds. When the first shoots of stinging nettles started coming up at the end of winter -- right about the time the root cellar was looking pretty darned barren -- those nasty stinging weeds must have looked like gifts from Heaven. I would have been a very lucky homesteader; my back paddock is absolutely loaded with them. As a long time Arizonan newly moved to Washington, I learned about stinging nettles the hard way. They made berry picking a real adventure for a novice forager. I returned home from every berry-picking foray with stinging, tingling rashes on my arms and legs, and it took me an embarrassingly long time to figure out that there were not hoards of invisible stinging insects living in the blackberry, thimble berry, and salmon berry hedges, just waiting for me to reach in for handful of those ripe, juicy treats! It wasn't until just a couple years ago, when I was exploring the back paddock of my new property, that I started putting together the long stalks of evenly-spaced leaves and dangling, wheat-like tufts of seed-heads with the instant hot prickle of a nettle sting. Before I made the connection, though, I spent days with burning, tingling, itching, and numb spots on my hands, legs, arms, and fingertips ... and at one point one whole side of my face. But eventually, I figured it out, with a little help from the Internet. A bit more research also verified my vague memory that they are edible, and while picking them is a screaming pain in the ... well ... basically anything that touches them, they are surprisingly tasty. For those living off the land at the end of winter, when there was very little else to be had, I bet they were even tastier. With such an authentic inspiration springing up all over the back half of my property, there was little question about it; stinging nettles would be the perfect main ingredient for the very timely arrival of Challenge #8: "Abstinence -- Lenten foods, temperance alternatives, or receipts reflecting scarcity." The Source: I began my hunt for a period recipe with a Google search for "nettle soup 1800's". Nearly all of the results that turned up were modern recipes from foraging sites, which wasn't what I was after at all. However there was one link that looked promising: a video called "Stinging Nettle Soup" from 18th Century Cooking with Jas. Townsend and Son.  It turns out that the video isn't really about a specific period recipe; the narrator, Jon. Townsend, is simply using period techniques to create a dish that's probably VERY authentic. At the beginning, though, Townsend mentions a quote found in the journal of John Heckewelder, a Pennsylvania missionary in 1756: “We live mostly upon nettles which grew abundantly in the bottoms and of which we frequently made two meals a day.” And later, in discussing his methods, he makes reference to a recipe for "meager soup" by Hannah Glasse, so that's where I looked next. Hannah Glasse's book, The Art of Cookery Made Plain and Easy, was published in 1747 in London. It was a best seller for a hundred years and was published in America in 1805. The note to the reader is particularly amusing, as Glasse expounds on her efforts to speak simply so any servants reading it might understand. I giggled at her haughtiness at first, but after reading on, I realized that her simplification for servants could prove very useful for ME in figuring out some of the unfamiliar techniques and terms often found in period cookery. I'm probably going to have to acquire this book for my collection, too. But if this trend of finding useful resources I don't have yet continues, I'm going to need a bigger kitchen bookshelf .... The Receipt: Soup-Meagre "Take a half a pound of butter, put it into a deep stew-pan, shake it about, and let it stand till it has done making a noise; then have ready six middling onions, peeled and cut small, throw them in, and shake them about. Take a bunch of celery clean washed and picked, cut it in pieces half as long as your finger, a large handful of spinach, clean washed and picked, a good lettuce clean washed, if you have it, and cut small, a little bundle of parsley chopped fine; shake all this well together in the pan for a quarter of an hour, then shake in a little flour, stir all together, and pour into the stew pan two quarts of boiling water. Take a handful of dry hard crust, throw in a tea-spoonful of beaten pepper, three blades of mace beat fine, stir all together, and let it boil softly for half an hour; then take it off the fire, and beat up the yolks of two eggs, and stir in, and one spoonful of vinegar; pour it into the soup-dish, and send it to the table. If you have any green peas, boil half a pint in the soup for a change."
I only cooked the veggies until the celery was a little softer and the greens wilted. It was probably less than the recommended fifteen minutes. Then I sprinkled flour over and added the liquid. The day before, I had boiled the carcass left from a roast chicken. I decided splurge and used that broth for part of the water. Then I added the bread (I used crumbs) and pepper. I used a hefty sprinkling of nutmeg because the period kitchen was lacking mace, and I'd forgotten to buy it on my way to the Fort. I also added a bit of salt. I let the mess boil for a while (I lost track of the time), and then I tasted it. To my horror, it tasted a great deal like miso soup. I hate miso soup .... Fighting off an impending sense of futility, I forced myself to see it through anyway. I added the beaten egg by tempering it first with a bit of the broth so it didn't curdle, and then I added the vinegar. I did not add peas. Time to Complete: It was quick and easy. Even though I was cooking it between preparing another dish and talking to a nearly steady stream of visitors, it took about an hour in total, and most of that was the soup quietly simmering on the stove top unattended. Total Cost: It was nearly free. The butter and flour were staples. The bread crumbs came from bread used in another recipe and could easily have been stale bread past eating that was set aside specifically for this sort of use. The eggs came from my hens. The greens came from my garden or the back paddock. The only thing I purchased was a head of celery at $1.49. If I'd had a well-stocked root cellar, I wouldn't have needed to buy that either. It's a very, VERY frugal dish ... but then, that was the point. Accuracy: I substituted nettles for all of the greens, leeks for onions, nutmeg for the mace, broth for some of the water, and I took some liberties with technique that were not in the receipt. I did not follow the receipt to the letter. However, like Jon. Townsend, I imagine that any housewife would have done as I did and created soup from nearly nothing to feed the family in times of scarcity. It's hard to argue with free soup!  How Successful Was It? Elizabeth, from Beth's Bobbins, put it best when she said, "I've had worse." Thankfully, the flavor was considerably less miso-like with the addition of the egg and vinegar. If I were hungry, and there were nothing else, eating it would not have been unpleasant ... but it certainly wasn't anything to write home about. (You can bet that I did NOT send Mom a brag text on this one!)
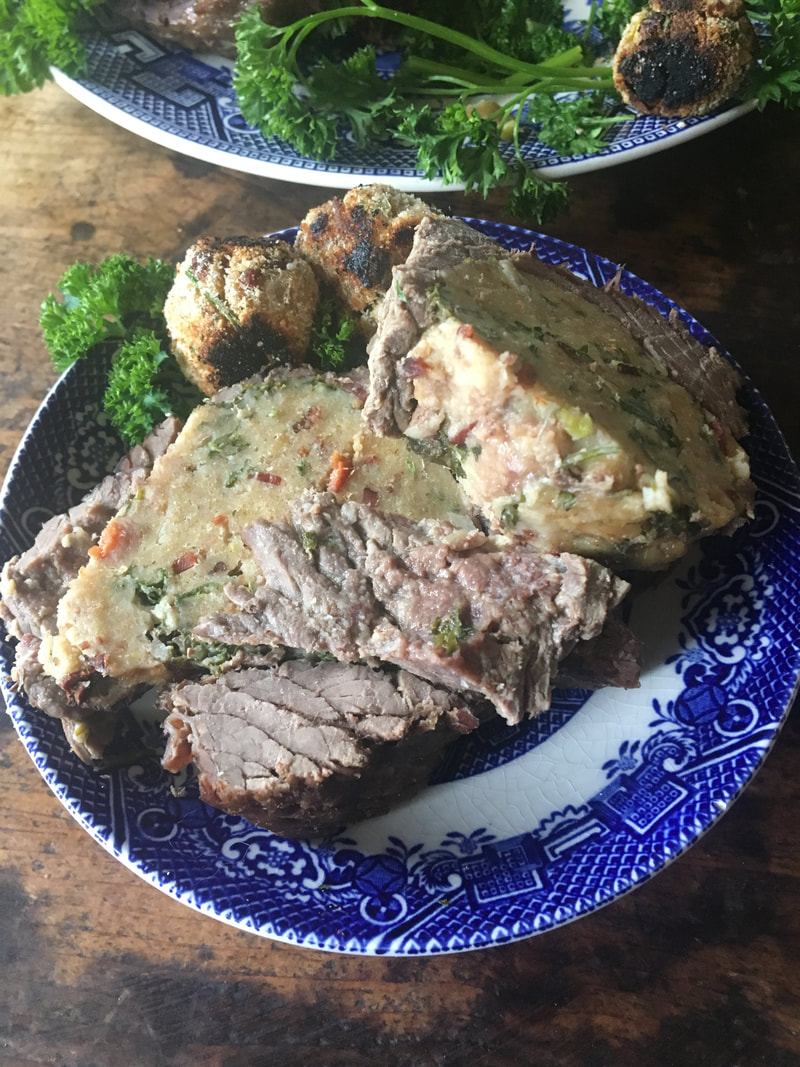
On the other hand, it truly was a dish that would fill the belly when little else was to be had. It was made completely out of ingredients on hand, and if I hadn't had access to the celery, I could have made do with just about any root vegetable, or even another couple leeks. In times of scarcity, this soup would have been welcome on the table because, as Elizabeth quipped so aptly, "Meager soup -- it's better than starving."  The Challenge: At my last trip to the Fort, I took care of two challenges. The Yarmouth biscuits in the previous post was the first; this was the second: "Faux Food -- Celebrate April Fool's Day with a food pretending to be something else." I didn't do it on April Fool's Day, but hey, I did it in April, and I call that close enough! Since I knew the oven and most of my attention would be taken up with baking biscuits and cakes for sampling to the public at my last Fort visit, whatever receipt I chose for this challenge would need to be made on the stove top, with little or no fussing after the initial preparation. So, I embarked upon an epic quest to find a "Mock Something" that would fit the bill. I nearly settled on Mock Turtle Soup for the diabolical factor alone (the mock turtle part is usually brains or some other organ meat) but I was saved from having to try and find brains on short notice when my eye happened upon a single line tucked deep in the index of the online book I was browsing: "Mock Hare." I was intrigued. A bit of paging through several more sources to compare recipes revealed that hare was a popular enough dish on Victorian tables that it was sorely missed when the season to hunt them was over. It was so popular, in fact, that it can be found in a number of cookery books from that era, and as a result, I had many versions to choose from. After reading a bunch of receipts and comparing methods, I realized that, when cooked on top of the stove, mock hare is basically a giant version of a beef olive, a period dish I've prepared before with good results, including winning a Fort cooking competition. Once I figured that out, I felt fairly confident that I could pretty much do as I liked because there are about a zillion different ways to handle beef olives, and the mock hare receipts were equally diverse. I picked the receipt that best fit my personal tastes and let me work around the other dishes I was serving at the event.  The Source: The Complete Cook was published in 1843 in Philadelphia. The author, James M. Sanderson, was the owner and chef at the Franklin House Hotel, which was, in its day, a landmark in Philadelphia. Interestingly, the author confesses in the preface that he isn't the writer of the book. Copyright laws as we know them weren't born until the late 1800's, so it was very common for one writer to shamelessly take the work of another, modify it as desired, and call it his own. Sanderson lauds the author of the original version, or "The English Edition" as he calls it, but he doesn't give the original author's name. He calls the version with his changes "The American Edition." In later editions, it was paired with "The Complete Confectioner" by Eleanor Parkinson, and they were bound together and sold as one book "intended for the use of persons who keep servants, and those who keep none." It contains "upwards of seven hundred receipts", ways to make expensive dishes more economically, and all of "that which a young cook has to learn." The Receipt: MOCK HARE "The inside lean of a sirloin of beef may be dressed so as to resemble hare, and is by many people greatly preferred to it. Make a good stuffing. If possible, get the inside meat of the whole length of sirloin, or even of two, lay the stuffing on half the length, turn the other end over and sew up the two sides with a strong twine, that will easily draw out when done; roast it nicely, taking care to baste it well, and serve with sauces and garnishes the same as hare; or, it may be partly roasted and then stewed, in rich thickened gravy with force meat balls, and sauce." The Receipt: STUFFING for HARE "Three ounces of fine bread crumbs, two ounces of beef suet, chopped fine, eschalot half a dachm, one drachm of parsley, a drachm of lemon thyme, marjoram, winter savoury, a drachm of grated lemon peel, and the same of pepper and salt; mix these with the white and yolk of an egg; do not make it thin, for if it is not stiff enough, it will be good for nothing; put it in the hare and sew it up; if the liver is quite sound, parboil it, mince it very fine, and put it in the stuffing."
The final step was to brown each side in some bacon drippings in a Dutch oven, add some water, put a lid on it, and let it cook. I turned it over a couple times to make it cook evenly, but other than that, I left it alone. In the meantime, I rolled the remaining force meat into balls and fried them up on a skillet in some bacon grease.
Total Cost: The cut of meat and fresh herbs were the most costly parts of this project. Even shopping frugally, I ended up spending about $25 for the ingredients, and that's without the components for the wine sauce, which would have nearly doubled the price. Next time, I'll make the forcemeat with herbs on hand, since I didn't find that the recommended herbs provided much improvement over the combination of herbs I would have chosen myself. With the use of old bread, a cheap cut of meat, and herbs and other ingredients on hand, however, this dish could be extremely frugal. The stuffing provides a tasty and filling component that stretches a small chunk of meat so it can serve a larger number of people as a main course, and it looks pretty on the table. Accuracy: Weeeelllll .... That depends on your definition of accuracy. Did I follow the receipt? Not even close! I had a great many 'faux' ingredients, I didn't follow the cooking instructions, and I didn't even attempt the gravy or sauce. Did I pull off a mock hare pretty much the way a frugal Victorian housewife would have done? Yes. I made due with the ingredients I had and ended with a dish that was attractive on the table, thoroughly resembled a cooked hare, and well received by my guests.
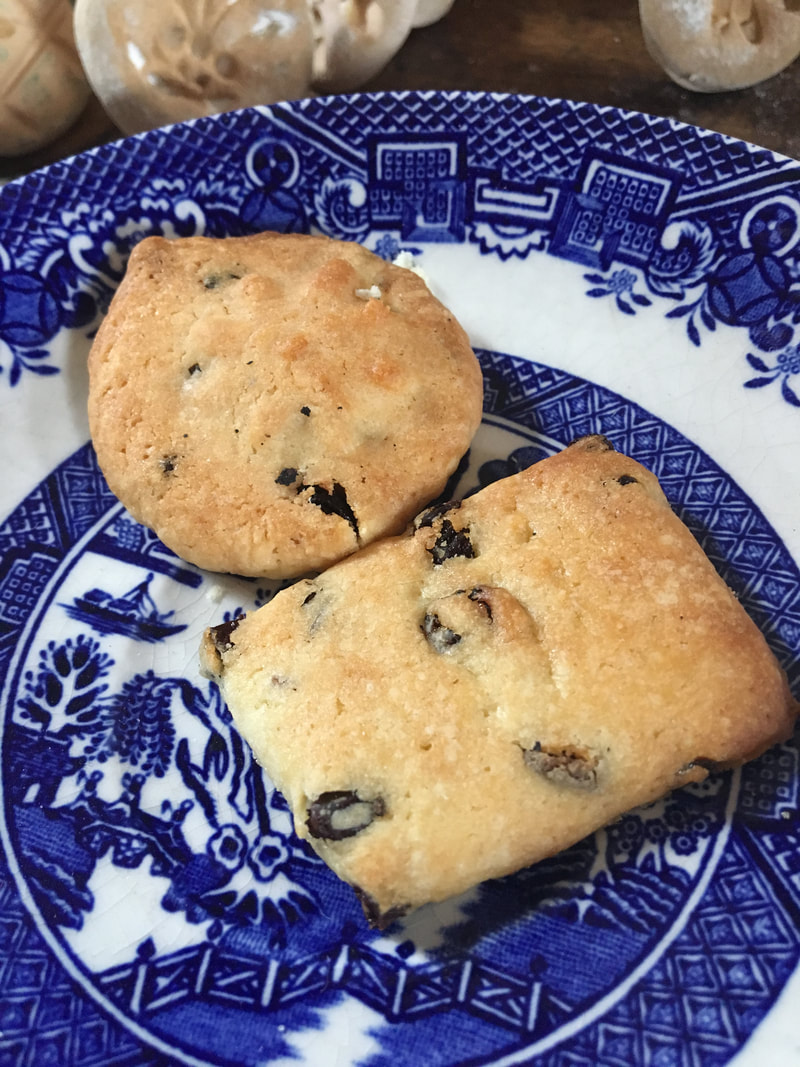
 The Challenge: Having gotten insanely behind on the fortnightly challenges, I had to try and kill two birds with one stone when I finally got to go to the Fort, so I knocked out two challenges in one trip (this is the first) ... and I provided tasty food samples to our guests at our first event of the year. Since I was feeding the public, I needed something easy and fairly foolproof that I could make in large quantities while engaging our visitors, answering questions, and adhering to Health Department standards about what we can serve and how we must prepare it. Fortunately, the challenge I needed to complete was "Easy as Pie -- Find a receipt that seems straightforward," and I found a simple receipt that's easy to remember, too.  The Source: I was looking for an excuse to make my great grandmother's fork cookies. They're fun, attractive, tasty, and simple, but I couldn't guarantee the recipe was old enough. I ended up spending way too many hours browsing period biscuit recipes looking for a facsimile, and I didn't find one. However, I did stumble across a fantastic resource: The Complete Biscuit and Gingerbread Baker’s Assistant by George Read, published in 1854. It’s a compendium of receipts for commercial baking and has instructions for mass producing a variety of cookies and cakes using the baking machinery of the era. Not only does it have a vast collection of receipts, but the incidental information scattered throughout the book reveals a great deal about period technique and ingredients that I've not found in any other resources. I'd strongly recommend that any historical foodie give it a look. Even if you don't prepare any of the receipts, it's worth reading the preface and glancing though the receipts. I liked it so much that it's now on my Amazon.com wish list; I need a hard copy in my collection, for sure. The Receipt: DERBY OR YARMOUTH BISCUITS "These are mostly known by the name of Derby cakes, but the original Yarmouth biscuits were made much richer than the Derby of the present day; viz., 12 oz. of flour, 1/2 lb. of butter, 1 lb. of loaf sugar, 1/2 oz. of currants, and 3 eggs - The modern method is the following: — 1/2 lb. of flour, 1/2 lb. of butter, 1/2 lb. of sugar, 1/2 lb. of currants, 3 eggs, a little milk, and 1/4 oz. of volatile salts. Rub the butter in with the flour, add the sugar, volatile salts, eggs, and milk, and make them into a paste of a moderate consistence; roll it out into a sheet an eighth of an inch in thickness, cut them out with a scalloped cutter, the same as is used for small seedies, place them on clean tins, and bake them in a brisk oven. Some of the dough may be made into cakes thus : — Make four penny cakes out of 5 or 6 ounces of dough, mould them up under the hand into a round ball, roll them out thin, and either pinch them round the edge, or leave them plain ; bake them in a brisk oven, as the others. Yarmouth biscuits are made by some persons of this paste, with the addition of a few caraway seeds, and by cutting them out with a diamond cutter, to vary the form." (sic)  How I Made It: I went with the 'modern method" because it's easy as pie to remember. I cut the butter up small and rubbed it in with the flour, then added the sugar. I substituted a quarter ounce (1 3/4 teaspoons) of baking powder because I thought the Health Department might object to smelling salts in the cookies. I used a technique I read in another source and dissolved the baking powder in a bit of milk and sprinkled it over the flour and butter mixture. After that, I put the currants in -- although the original receipt doesn't say when to add them -- I also tossed in about a tablespoon of caraway seeds, too. I beat the eggs a bit before adding them to the dry ingredients, then added milk to make the mixture workable. I didn't measure, though; I just added it until I had a soft dough.
Time to Complete: It took the longest to work the butter into the flour because the butter was cold from the store, and it wasn't warm enough in the kitchen to help much. Once the dough came together, though, the biscuits cooked very, very quickly. (I burned some of them, in fact. The oven was definitely hot enough.) The batch was huge, and there's only one usable rack in the oven, so baking them took a couple hours. I'm sure in a modern kitchen, with larger cookie sheets, it would be about an hour and a half project from start to finish, including clean up. Total Cost: All ingredients were on hand at the Fort, so it cost nothing, but if you need to shop for this treat, caraway seeds are about $5 for a new bottle, and a new box of currants is around $7.
 The Challenge: The challenge for the weeks spanning the end of February and the beginning of March was “Indulgence -- a dish associated with Mardi Gras, or an ingredient that is ‘indulgent’ for you.” Nothing sprang immediately to mind, so I reached for The French Cook, the book in my period cookery collection that was most likely to yield something useful. It didn’t take long for me to find my answer: chocolate souffle. Mardi Gras is French, the book is French -- and anytime I think of indulgence, I think of chocolate. Plus, souffles have a reputation for being hard to make, so that upped the level of decadence another notch. If I could pull off a chocolate souffle from a 178-year-old receipt in the period kitchen, it would be the epitome of indulgence … and if not, well, it would sure make a great What the Heck Happened post. That clinched it. Bracing myself for abject failure, I went shopping for my supplies and headed for the Fort.  The Source: The first edition of The French Cook, by Louis Eustache Ude, was published in 1813, but my copy is of the fourteenth edition, printed in 1841. Ude lists his credentials at the beginning: "Ci-devant cook to Louis XVI., Charles X., and the Earl of Sefton; Projector of the original coffee-room held in the United Service Club House in Albemarle Street; Steward to His Late Royal Highness the Duke of York; and for twelve successive years steward and manager of The St. James's Club." With credentials like that, I knew he wouldn't steer me wrong; I just hoped I could luck out and somehow coax Bessie (the period wood stove) into helping me produce a decadent chocolate souffle ... and not an embarrassing chocolate "so-flat". The Receipt: SOUFFLE OF CHOCOLATE "Take a quarter of a pound of chocolate, which cut as small as you can, and melt it on the fire in a little water. When it is entirely melted, throw it into the souffle preparation, No. 762, the same as the others." (That's it? Really? Quin heaves a sigh and starts flipping back through previous pages until she comes to receipt #762.) From receipt #762, SOUFFLE OF BREAD: "Boil some milk with a little cream, to which give any taste which you feel proper. Throw into it the soft part of two or three fresh rolls to soak, rub the bread through a sieve, and proceed with the eggs, butter, sugar, &ct., as in the three preceding numbers." (Seriously, Louis? It's like a crazy French version of a Choose-Your-Own-Adventure cookbook!) From receipt #759, SOUFFLE DE POMMES DE TERRE AU CITRON: (This receipt began with the floury part of baked potatoes, but I'm using bread) "... and mix it with a half a pint of cream ... To this add a little sugar, a large bit of butter, and a little salt; the taste of the sugar, however, must predominate; yet observe, that the less sugar you use, the lighter the souffles will be. Now break six eggs, throw the yolks of four only into the [bread and milk mixture], beat the six whites, which pour gently with the above preparation into a souffle-dish, add to it an ounce of fresh butter, and put it into the oven, which must not be too hot. When the souffle is done enough, powder a little sugar over it, and use the salamander; souffles must be served up the moment they are ready, for they are liable to sink." (After all that, note the distinct lack of measurements for everything but the cream and the eggs. And what the heck is up with adding butter AFTER it's in the souffle dish? We won't even talk about the directions for how much sugar to use. Thanks, Louis. You're a GREAT help.)  How I Made It: I began by separating the crumb from the crust of three fresh rolls and finely chopping the bar of chocolate. I used Ghirardelli's 100% unsweetened cacao. Next, I poured a half pint of cream and an equal amount of milk into a saucepan and set it on the stovetop to heat. I decided not to melt the chocolate in water when I already had a nice pint of creamy milk to use instead, so I waited for it to boil, then dumped in the chocolate and stirred it a bit to encourage the chocolate to melt. Then I threw in the bread to soak for a while. I prepared the eggs in the meantime. Things got a bit interesting with the eggs. We had visitors, and I suddenly seemed to forget how to separate eggs. On the first one, I punched my thumb through the yolk and fouled the deep narrow pitcher I was going to use to whip the whites. I washed it thoroughly and started over. I broke the second egg ... and put the egg white into the "safety bowl" and dropped the yolk into the pitcher. I didn't swear. At this point, I was feeling like a complete dipstick, and visitors were coming in and out at intervals. Flustered, I washed the pitcher a second time, and floundered through another couple of eggs until I got into a rhythm for keeping count of the eggs and getting everything into the right vessels. Or so I thought. Things got screwy here, but I'll tell you what I did when I get to the part where I figured it out myself. That way, you can experience the same dismay that I did.
I had begun cleaning up the work table when horror struck. I picked up the bowl with the extra egg yolks and considered using them to make custard. Staring thoughtfully at the four yellow globs, I got that feeling in my gut: four egg yolks in the bowl. The instructions said to break six eggs and use the yolks of four. I'd used the yolks of two. And it was far too late to do anything about it. I shot another silent prayer at the closed oven door and bided my time until it was safe to open it. I was pretty sure that when I checked on my souffles, I'd have two wads of chocolate disaster. I finished clearing up, and then I couldn't resist opening the oven any longer. Bessie has a hot spot on the side nearest the fire box, and there was a very strong chance that side could be burning while the other remained near raw. To cook evenly, things have to be turned throughout the cooking process. And souffles aren't supposed to be disturbed until they are done baking. What a quandary! I took my chances and carefully opened the door -- like I was trying to sneak up on a lit stick of dynamite. Reaching in, I gently, slowly rotated each makeshift ramekin 180 degrees, and then eased the door closed again. Nothing was burnt, but both of them seemed to be rising to at least some degree. I crossed my fingers and waited.
When I checked back a while later (I'm not actually sure exactly how much time passed), the small souffle in the tea cup looked firm, pulled away from the sides, and it had risen very nicely. I took it out like I was handling a bomb and tested it with a knife. Nothing sticky came out; it was done -- and it looked EXACTLY like a souffle! After another fifteen minutes, the full-sized souffle was ready to come out, too. I sprinkled some sugar on the top, garnished with some flowers from the garden bed, and served it up.
How Successful Was It? It was absolutely divine! Even with my errors and the inaccurate measurement, I'd say it was an unmitigated success. The flavor and texture were perfect: light, moist, chocolaty, and exactly the right amount of sweet. If this one could turn out this scrumptious with all the glitches AND baking it in a wood stove, I'd say that souffles are considerably more accessible and forgiving than we have been led to believe. Would I recommend it? Yes. Without reservation. If you want to impress the tar out of somebody with your baking prowess, make them Louis Ude's 1841 souffle of chocolate! (You won't even have to worry about being good at counting eggs.)
|